
Latest topics
» Good place to get Limestone rocks?by sheridan Thu 25 Jul 2019, 1:02 pm
» Looking for Apex AWM module
by BBolen Wed 13 Mar 2019, 12:39 pm
» Selling my Red Sea Max 130D
by TWBriz Tue 05 Jul 2016, 12:54 pm
» Collectors sps frag pack
by blueseatex Thu 30 Jun 2016, 12:01 pm
» Selling a couple of tanks
by Danny21 Tue 21 Jun 2016, 4:50 pm
» Reef Breakdown Sale
by David012081 Sun 17 Apr 2016, 9:33 pm
» Reef tank breakdown sale.
by ritter678 Wed 13 Jan 2016, 10:29 pm
» Converting 90 gallon reef tank to freshwater sale
by oifwarvet Sat 09 Jan 2016, 8:58 pm
» mp10Wes,Storm controller, oxidator
by blueseatex Wed 09 Dec 2015, 11:29 pm
» FREE starry blenny. Very healthy.
by jakebetts0501 Sun 08 Nov 2015, 2:17 am
» Help with lighting.
by oifwarvet Fri 06 Nov 2015, 8:55 am
» equipment bonanza
by Carabelli Mon 02 Nov 2015, 12:32 pm
» Need to Sell all livestock and LR
by grawlfang Sat 24 Oct 2015, 2:45 pm
» Fish tank and equipment for sale!
by anthonydsims34 Tue 13 Oct 2015, 2:29 pm
» North Texas Reef Fanatics October Coral Frag Swap
by markmesquite Fri 28 Aug 2015, 11:53 am
Sponsors


Like/Tweet/+1
Troy's 105g Build... With Pics
+4
matt_longview
reileywatts
J.Davis
yort82
8 posters
:: Show of your tank :: Tank Builds
Page 1 of 1

Troy's 105g Build... With Pics
![]() by yort82 Fri 29 Mar 2013, 12:50 pm
by yort82 Fri 29 Mar 2013, 12:50 pm
SO it's been a long time coming. I started researching back at the end of June. Then started buying bits and pieces here and there to gather everything together that I'd need to start my own reef tank. After figuring out what I wanted, I started the process of getting quotes & estimates, talking to reefers, asking questions, etc... This is what I ended up with:
I apologize in advance for the crappy cell phone pics. They do not get the white balance correct, so the pics of the tank are very blue. It's not that blue in real life.
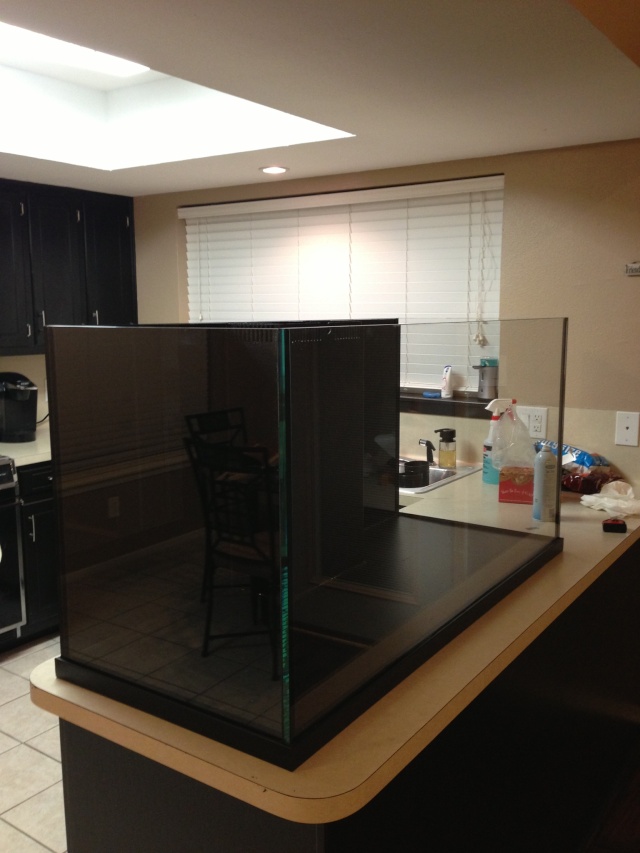
THE TANK:
105g Custom Built by Planet Aquariums, Dallas, TX 48 x 20.5 x 25
(totally empty, actual water volume is around 90g)
This was at their factory in Dallas.

Getting it in the house was nerve racking!
THE ROCK:
80lbs of BRS Reef Saver dry rock. I originally went with BRS's Pukani dry rock, but couldn't come up with anything I liked, plus I didn't realize how much dead organic material was on it... So I sold it to a forum member and bought the reef saver. I'm glad I did. It's easy to aquascape and it's totally void of life.. AND phosphate. Here's a pic of it all when it came in.

THE SUMP & SKIMMER
After researching sumps, and thinking about building my own, I soon realized I wouldn't be happy with anything I came up with because I had seen pictures of custom acrylic sumps made by Melev's Reef. I spoke with Marc on several occasions and finally decided to pull the trigger after the stand was built and I knew exactly what size I could fit. I couldn't be happier with what I ended up with! When I went to pick the sump up at his house in Ft. Worth, I spent nearly 3 hours talking to him about reefkeeping and getting tips & pointers and asking lots of questions. He's a great guy!

I spoke to Jeremy at Premium Aquatics after debating on a few skimmers that would work for my tank. After talking to him, I decided to give his recommendation a try. It's the Vertex Omega 150. It was about half as expensive as the skimmer I originally wanted, so I was pleased. So far I have to say that it's great and I'd definitely recommend it to anyone!

THE STAND:
I knew with a custom tank that it'd be near impossible to find a stand that fits it. So I called the best cabinet builder in town. Sherman Henderson of Henderson's Custom Cabinets does great work, AND he's very easy to work with. Whether it's a full blown kitchen remodel or an aquarium stand, he can do it. I had it painted by a guy I know, but ended up putting a final coat on it myself because I chose the wrong finish the first time. That was my fault, not his... haha

Fitting everything into this stand was difficult. There were lots of plans. Then there were lots of changes. Then there was hair pulling. In the end, it all fit. It's cramped, but everything works. This pic was taken late at night after I had been modifying things and planning things. I went to the kitchen to get a drink and turned around to this:

After lots of work, it finally came together:

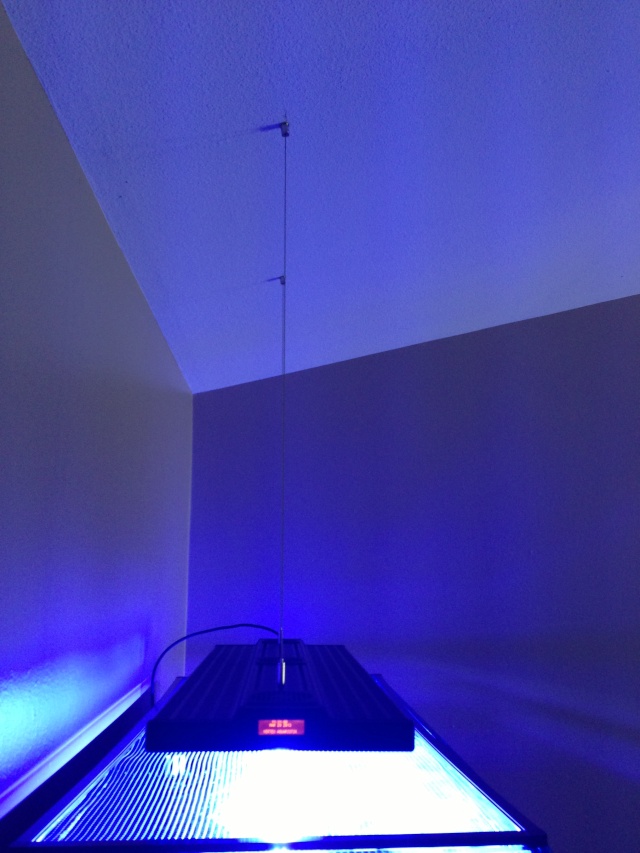
THE LIGHT:
When doing research and looking at several examples of people's tanks around various forums, I soon decided I liked the clean sleek look of rimless tanks so that's what I ended up with. When looking for a light, I was looking for the same thing. Something clean, sleek, and something that offered a lot of features and flexibility. I went with the Vertex Illumina SR360 and haven't looked back! I love this fixture. I love the light it puts out, the way it looks hanging above the tank, and the flexibility it offers. Installing this light was a small nightmare, but in the end, it was worth it.

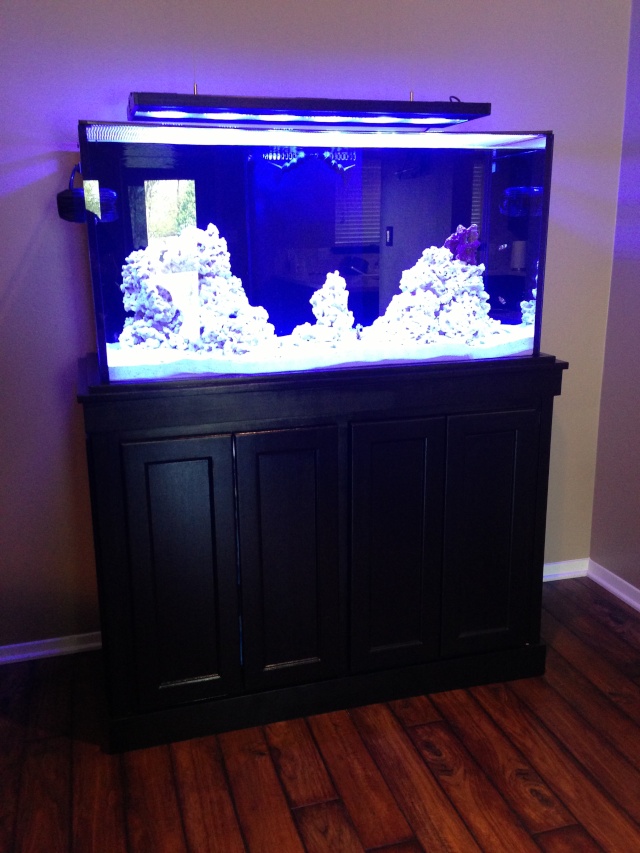
FTS:
Right now there's not much in the tank. 2 ocellaris clowns, a coral banded shrimp, a brittle star, numerous snails, and 5 frags -- a green torch coral, purple dragon zoas, glove polyps, a duncan, and something that I didn't order. HA It's some kind of orange zoa, but unique corals is making it right, so I can't complain. This pic was taken before the snails and coral:

This is how the tank looks when you step back to look at it:
I hope you enjoyed reading this thread. After only 2 months of life in the tank, I can already tell that this hobby is incredibly rewarding. I'm looking forward to progressing down the road!
If you have any further questions, or would like more information, don't hesitate to PM me.
Have a great day!
Troy
I apologize in advance for the crappy cell phone pics. They do not get the white balance correct, so the pics of the tank are very blue. It's not that blue in real life.
THE TANK:
105g Custom Built by Planet Aquariums, Dallas, TX 48 x 20.5 x 25
(totally empty, actual water volume is around 90g)
This was at their factory in Dallas.
Getting it in the house was nerve racking!
THE ROCK:
80lbs of BRS Reef Saver dry rock. I originally went with BRS's Pukani dry rock, but couldn't come up with anything I liked, plus I didn't realize how much dead organic material was on it... So I sold it to a forum member and bought the reef saver. I'm glad I did. It's easy to aquascape and it's totally void of life.. AND phosphate.
THE SUMP & SKIMMER
After researching sumps, and thinking about building my own, I soon realized I wouldn't be happy with anything I came up with because I had seen pictures of custom acrylic sumps made by Melev's Reef. I spoke with Marc on several occasions and finally decided to pull the trigger after the stand was built and I knew exactly what size I could fit. I couldn't be happier with what I ended up with! When I went to pick the sump up at his house in Ft. Worth, I spent nearly 3 hours talking to him about reefkeeping and getting tips & pointers and asking lots of questions. He's a great guy!
I spoke to Jeremy at Premium Aquatics after debating on a few skimmers that would work for my tank. After talking to him, I decided to give his recommendation a try. It's the Vertex Omega 150. It was about half as expensive as the skimmer I originally wanted, so I was pleased. So far I have to say that it's great and I'd definitely recommend it to anyone!
THE STAND:
I knew with a custom tank that it'd be near impossible to find a stand that fits it. So I called the best cabinet builder in town. Sherman Henderson of Henderson's Custom Cabinets does great work, AND he's very easy to work with. Whether it's a full blown kitchen remodel or an aquarium stand, he can do it. I had it painted by a guy I know, but ended up putting a final coat on it myself because I chose the wrong finish the first time. That was my fault, not his... haha
Fitting everything into this stand was difficult. There were lots of plans. Then there were lots of changes. Then there was hair pulling. In the end, it all fit. It's cramped, but everything works. This pic was taken late at night after I had been modifying things and planning things. I went to the kitchen to get a drink and turned around to this:
After lots of work, it finally came together:
THE LIGHT:
When doing research and looking at several examples of people's tanks around various forums, I soon decided I liked the clean sleek look of rimless tanks so that's what I ended up with. When looking for a light, I was looking for the same thing. Something clean, sleek, and something that offered a lot of features and flexibility. I went with the Vertex Illumina SR360 and haven't looked back! I love this fixture. I love the light it puts out, the way it looks hanging above the tank, and the flexibility it offers. Installing this light was a small nightmare, but in the end, it was worth it.
FTS:
Right now there's not much in the tank. 2 ocellaris clowns, a coral banded shrimp, a brittle star, numerous snails, and 5 frags -- a green torch coral, purple dragon zoas, glove polyps, a duncan, and something that I didn't order. HA It's some kind of orange zoa, but unique corals is making it right, so I can't complain. This pic was taken before the snails and coral:
This is how the tank looks when you step back to look at it:
I hope you enjoyed reading this thread. After only 2 months of life in the tank, I can already tell that this hobby is incredibly rewarding. I'm looking forward to progressing down the road!
If you have any further questions, or would like more information, don't hesitate to PM me.
Have a great day!
Troy
Last edited by yort82 on Fri 29 Mar 2013, 1:37 pm; edited 6 times in total
yort82- Monti Cap

- Posts : 66
Points : 4396
Reputation : 10
Join date : 2012-07-31
Age : 41
Location : Longview
Re: Troy's 105g Build... With Pics
![]() by yort82 Fri 29 Mar 2013, 1:00 pm
by yort82 Fri 29 Mar 2013, 1:00 pm
FYI: On mobile devices, the pics are cut in half for some reason. If you'd like to view the full pics, a desktop browser works fine. (I'm using Google Chrome)
EDIT: I changed the size on the hosted image. Hopefully more of the pic will show.
EDIT: I changed the size on the hosted image. Hopefully more of the pic will show.
yort82- Monti Cap
- Posts : 66
Points : 4396
Reputation : 10
Join date : 2012-07-31
Age : 41
Location : Longview
Re: Troy's 105g Build... With Pics
![]() by J.Davis Fri 29 Mar 2013, 4:24 pm
by J.Davis Fri 29 Mar 2013, 4:24 pm
Well done Troy.
FYI-
It's madding how Troy fit all that he did into the cabinet And kept it clean & orderly! Seen it in person... very impressed.
FYI-
It's madding how Troy fit all that he did into the cabinet And kept it clean & orderly! Seen it in person... very impressed.

J.Davis- .

- Posts : 1252
Points : 6421
Reputation : 30
Join date : 2011-01-18
Location : Longview -


reileywatts- .

- Posts : 281
Points : 5242
Reputation : 20
Join date : 2011-01-17
Age : 42
Location : Flint, TX
Re: Troy's 105g Build... With Pics
![]() by yort82 Fri 29 Mar 2013, 6:02 pm
by yort82 Fri 29 Mar 2013, 6:02 pm
Thanks guys! Now that it's up & running and it turned out the way it did, I'm proud of it. haha.
yort82- Monti Cap
- Posts : 66
Points : 4396
Reputation : 10
Join date : 2012-07-31
Age : 41
Location : Longview
Re: Troy's 105g Build... With Pics
![]() by matt_longview Sat 30 Mar 2013, 12:19 am
by matt_longview Sat 30 Mar 2013, 12:19 am
Amazing build. You did this right Troy. Very right!!! :-). Keep us updated OFTEN!

matt_longview- .
- Posts : 2388
Points : 7542
Reputation : 0
Join date : 2011-01-18
Age : 38
Location : Longview TX
Re: Troy's 105g Build... With Pics
![]() by grawlfang Sat 30 Mar 2013, 11:03 am
by grawlfang Sat 30 Mar 2013, 11:03 am
I was just there yesterday and this thing is Amazing, wait till you see what he has planned for a salt mixture tank and other ideas  It is very quiet he has his protien skimmer air intake routed to the outside of the house. He did this right with research, viewing our setups and asking questions, alas most of use don't have the cash to build something like this
GREAT job Troy, hope you can make Aprils meeting.
GREAT job Troy, hope you can make Aprils meeting.

grawlfang- .

- Posts : 611
Points : 5279
Reputation : 10
Join date : 2011-11-26
Age : 60
Location : Longview
Re: Troy's 105g Build... With Pics
![]() by yort82 Sat 30 Mar 2013, 2:17 pm
by yort82 Sat 30 Mar 2013, 2:17 pm
Thanks guys! I hope to be able to make the meeting so I can meet more of you.
yort82- Monti Cap
- Posts : 66
Points : 4396
Reputation : 10
Join date : 2012-07-31
Age : 41
Location : Longview
Re: Troy's 105g Build... With Pics
![]() by Yeti Sat 30 Mar 2013, 8:19 pm
by Yeti Sat 30 Mar 2013, 8:19 pm
That's an awesome build, ohhhhh and that sump, great design.

Yeti- .
- Posts : 1030
Points : 5964
Reputation : 0
Join date : 2011-02-02
Age : 65
Location : Tyler
Re: Troy's 105g Build... With Pics
![]() by bigeflashgordon Sat 30 Mar 2013, 11:02 pm
by bigeflashgordon Sat 30 Mar 2013, 11:02 pm
That is such a sweet set up.. It's going to look awesome when it's stocked and everything grows out, good luck man!

bigeflashgordon- .

- Posts : 302
Points : 4989
Reputation : 0
Join date : 2011-10-26
Age : 34
Location : Tyler
Re: Troy's 105g Build... With Pics
![]() by yort82 Sat 30 Mar 2013, 11:27 pm
by yort82 Sat 30 Mar 2013, 11:27 pm
thanks! I'm looking forward to it too!
yort82- Monti Cap
- Posts : 66
Points : 4396
Reputation : 10
Join date : 2012-07-31
Age : 41
Location : Longview
Re: Troy's 105g Build... With Pics
![]() by SeanT Sun 31 Mar 2013, 1:42 am
by SeanT Sun 31 Mar 2013, 1:42 am
Look up "Sexy Tank" in the dictionary, you'll find a picture of this setup!! VERY, VERY NICE!! Looks like you left out the MP40w's in your description? All you need now is some of my frags!! (o:
SeanT- Lion Fish

- Posts : 234
Points : 4909
Reputation : 0
Join date : 2011-10-18
Location : Tyler, Tx
Re: Troy's 105g Build... With Pics
![]() by yort82 Sun 31 Mar 2013, 6:46 pm
by yort82 Sun 31 Mar 2013, 6:46 pm
Thanks for all the replies and kind words!
I didn't include all of the equipment in the original writeup... Here's a more complete equipment list if anybody was curious:
Circulation: (2) VorTech MP40s
Return Pump: (1) Eheim Compact+ 3000
Reactor Pump: (1) Eheim Compact+ 5000
Controller: Neptune Systems Apex AquaController; 2 EnergyBar 8's; PM2 Module (Salinity); WXM Module (to control MP40s); Breakout Box for various dry-contact switches
Light: 3' Vertex Illumina SR360
Skimmer: Vertex Omega 150
Skimmer Neck Cleaner: Vertex Vectra
Skimmate Container: AVAST Marine Skimmate locker with directwire pressure switch for Apex Breakout Box (kills skimmer when collector is full)
Dosing: (2) BRS Peristalic Dosing pumps for Alk & Cal
Biopellet Reactor: Reef Octopus BR-110 (using BRS Biopellets)
Carbon Reactor: BRS Deluxe Media Reactor
GFO Reactor: BRS Deluxe Media Reactor (not currently used)
ATO Controller: Tunze Osmolator Universal 3155
RO/DI unit: BRS 6-stage Deluxe unit for Chloramines with the 150 GPD upgrade kit and booster pump.
I can't think of anything else at the moment. Overall, everything seems to work as expected.
If you have any questions about anything, feel free to ask. If you have any suggestions as to making this setup work better/quieter/longer/easier/etc... I'd love to hear them!
Thanks,
Troy
yort82- Monti Cap
- Posts : 66
Points : 4396
Reputation : 10
Join date : 2012-07-31
Age : 41
Location : Longview
Re: Troy's 105g Build... With Pics
![]() by matt_longview Sun 31 Mar 2013, 7:52 pm
by matt_longview Sun 31 Mar 2013, 7:52 pm
That is an excellent equipment list. Very well done. You purchased this equipment for the dream setup! Looking forward to this!!!
matt_longview- .
- Posts : 2388
Points : 7542
Reputation : 0
Join date : 2011-01-18
Age : 38
Location : Longview TX
:: Show of your tank :: Tank Builds
Page 1 of 1
Permissions in this forum:
You cannot reply to topics in this forum|
|
|